Showing posts with label stumpwork. Show all posts

Wednesday, July 27, 2011

Paddy yet again

I've been working on Padparadscha, although I did take a week off to help the daughter to look for her dragon. Little idiot decided to take Calypso outside... and Calypso decided to make a break for it. We are now going to hope she survives until it starts getting cooler out, then we'll try to recapture her before it gets too cold and kills her. Keep both daughter and dragon in your good thoughts/prayers/whatevers as the one won't survive the winter, and the other would grieve terribly if she doesn't.

Anyway, I have started doing the metallic thread in fly stitch, and I think it looks glorious! Thank you ever so much Rachel for the suggestion. I also did the nostril with a four ply french knot in the two lighter silks, with a small stitch in the center of the metallic, to darken the middle, if you see what I mean. The eye is done with a size 11 seed bead, and I did a small stitch of the metallic thread over the center of the bead, sort of like a pupil.
As you can see in the picture, I added the bottom wing as well. I used the metallic to add the wing struts--what are those called when it isn't an airplane? I still have the tail portion to do with the metallic, but so far it looks lovely. I plan to add a trellis stitch over the pearl in the metallic thread. After that, I really need to get the legs in so I can do some of the vegetation he is standing in.

Okay, here are a couple of pictures that will make you go, "Awwwwww!"

Detente kitties.
    
Calypso napping in her food dish--with lunch.

THE Magpie

Tuesday, July 12, 2011

Busy. But managed to carve some time for Padparadscha

Well, I got a bit more done on Padparadscha. I am starting to feel a bit more confident about my abilities as an embroidress, even to contemplating actually doing one of the Helen Stevens bird pictures, as opposed to just drooling over the photos in her books. I have an assortment of the flat silks, the ones used in the Chinese embroideries that so often crop up in the restaurants, mostly because they are drop dead gorgeous, plus the colors are to die for--or dye for, as the case may be.

Anyway, here is Paddy as far as I have gotten.
I am not sure how I am going to do his nostril, but his eye is going to be a bead--maybe one of my glow in the dark beads--we'll see. I think I am going to finish the mid color overlay, and then do the metallic fly stitch. His legs are going to be silk most of the way down, and the toes and claws I am planning to do in the metallic braid. Here is a close up of the stitching and overlay.
Once I stitch in the legs and finish the body, I plan to add the left wing, which will be tacked down to the ground fabric. After I finish that and before I do the feet, I plan to start the background. I have some fluffy and fancy yarns to use for grass and bushes.

Okay, I have to post some pictures of the other dragon in my life. She is a cutie pie, and sleeps in the most silly positions.

In this picture, she was asleep, but we woke her when we took the picture.
We measured her, and she is about seven inches long from nose to tail tip.

THE Magpie

Tuesday, June 28, 2011

Dragon, take 42--no wait, that's the meaning of life, the universe...

First, Rachel and RogerBW, thank you for your kind comments. Also for your excellent suggestions. I think I am going to take part of one of Rachel's for the scales, I am going to do layered split stitch (I think that is the one) where you do straight stitches very close together--it isn't satin stitch, which I had pondered but rejected as too smooth, and I learned it doing a very pretty Rowandean kit of a black cat--I really liked how you can curve the stitches around and do very pretty contouring. I am going to use the three colors of silk, layering them from dark to light, and the rust/brown/orange metallic ribbon, which will go on last in fly stitch. I really liked that idea for showing the scales.

Here is the dragon's pearl, as far as I have stitched it. I plan to use some of the metallic and the overdyed silk to do a couched trellis over it.
 I did a padded satin stitch over felt padding. Here is a picture of the partial first layer of satin stitching showing the felt padding underneath.
 I finished the wings finally. I didn't use wire for the second wing, as I am going to tack it down to the ground fabric rather than have it sticking out. I wanted both wings to look the same however, so I backstitched around the wing shape and then whip stitched the same as I did for the wired wing.
 This is the wired wing, with the whip stitch done. I still want to add some veining to the wing, probably with the aforementioned metallic.
Here are both wings with the whip stitch finished. The sparkliness of the base fabrics really shows in the picture.
 I decided to backstitch around the body of the dragon so that I would have an idea of where I was going, and partly to fill time while I noodled around with what I was going to do next.
And finally, here is is with his body backstitched in. I think he is a happy dragon. Maybe someone is going to play ball with him...

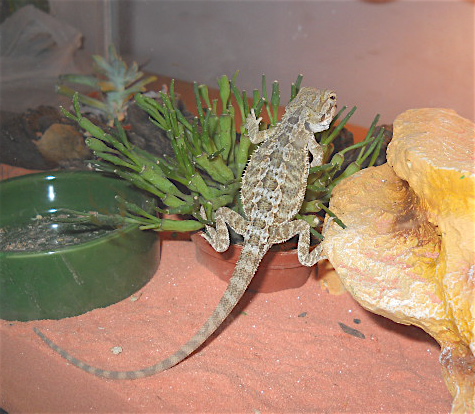
In other news, my daughter finally wheedled me into driving her to the local pet shop so that she could acquire her own dragon, of the Australian bearded variety. Her name is Calypso, and I'm pretty sure that pictures of her will probably show up here from time to time. She has settled into her new home very happily, and loves to chase down and eat crickets and mealworms. Not that she has to chase the worms as they just squirm in her food bowl.

THE Magpie.

Thursday, June 23, 2011

More on the dragon

His name is now Padparadscha, which according to Wikipedia is the name given to a pinkish orange colored sapphire, and the word is from the Sinhalese word for lotus blossom. Read more about sapphires than you probably want to know at this address,  http://en.wikipedia.org/wiki/Sapphire#Padparadscha.
I have seen padparadschas, and they are about the same color as the silks I got to stitch him with, hence the naming.

Meanwhile, I have been watching the children (home from school for the summer)  and so haven't gotten a lot done on him, but I did get a bit done. Here is the dragon picture transferred to the blue cotton background.


It is pretty faint, which is good so far as covering up the markings is concerned.


This is a much better photo of the contrast between the top and bottom fabrics of the wings.

These are the silks I got to use on Padparadscha, also the ombre Silk n Colors I am using from my stash and the metallic braid I am planning to use.
This is the wing partly tacked in. I made a pattern piece of the wing, and did running stitch around the outside. Then I tacked the wire down following the running stitch lines.


Here is the wing with the wire tacked down around the outside edge, and I have started whip stitching over the entire wire. I am using the silk and colors for this part.


THE Magpie

Sunday, June 19, 2011

New embroidery/stumpwork project.


This one is an original design, by me. I draw nominally well, my Mom and my daughter are much better than I am, but after nagging the daughter for ages to draw me a small dragon to convert to stumpwork, I figured that it would get done a lot sooner if I just put pencil to paper, drew it myself and fix the poor drawing skills with thread and needle.

It isn't totally horrible, I guess. The hind legs took a bit of working out, and I am still not totally excited about them, but I think once I transfer it to fabric I think it will end up looking a lot better. I only drew in one wing, as I am going to make the other wing as a detached piece, using whip stitch to hold the wire armature in place. I am using gold lame sandwiched with orange organza. I used wonder under to connect the two fabrics, and attached them with the threads of one piece at a 45 degree angle to the other. This is a tip that Jane Nicholas gave during a class of hers I was fortunate to be able to attend. The reason is that this way you have way more stability when you whip stitch the wire armature onto the fabric, as the threads go every which way rather than being orderly.
Here is the detached wing pattern. I plan to do the outer border in one piece of wire, and then cut and whip stitch the three supporting bars.
gold lame side, underside of wing

orange organza side, upper side of wing
These two pictures are the front and back of the wing fabric. The colors did not come out terribly well, but are somewhat close to the actual colors. This is a four inch hoop, and the dragon piece is going to be about 6 inches in diameter, with borders and all. I didn't take a picture of the background fabric yet, it is a pale blue cotton fabric. The dragon body may be done in a pale orange satin with stitched details, or I may do padded satin stitch or something else.
This is the orange satin I may use for the body. I got some orange and rust silks, Splendour brand by Rainbow Gallery, along with a card of an orange and rust metallic also by them yesterday at the Stitching Post in Columbia MD. I'll put pictures of them up on a future post.
This is some Fun Fur yarn that I am planning to use for the background of the dragon picture. Except for the skein second from the left, which will be couched down as the dragons flame.
Moire fabric that my Mom gave me because she wasn't planning to use it. Pretty colors, and ivory as well. I may have to do a unicorn head on the purple fabric. Mum quilts, and I think she got these to do a fancy crazy quilt with. Oh, and a tip for people who like pretty fabrics to use as backgrounds for embroidery. Obsessively examine the remnant bins at your local fabric shops. I scored two sizeable pieces of ivory silk dupion for less than half price--the remnants were marked as 50 percent off, and then they had a sale going of 50 percent off that. I also got the satin and the organza for the dragon at the same sale. Also, go to thrift stores. I get old cotton sheets to use as stabilizer for stitchery there, it is way less expensive than the muslin from the fabric store. Plus, you get to feel all virtuous for recycling.

These are sets of prayer beads that I make for donating to a group called On Beads of Prayer. The organizer of the group started it to provide prayer beads to soldiers who want them at no cost to the soldiers. She sells fancier ones to make money to pay for postage and beads and wire and etc... I just found out that the last batch I gave her sold out "like hotcakes" so I have been assembling a new batch.

THE Magpie


Wednesday, January 26, 2011

Beading and Embroidering

Here is the picture of the framed Wizard hat.  It was inspired by the description of the Archchancellor of Unseen University's ceremonial hat, written down by Terry Pratchett in his book Sourcery. I stitched in the footnote he had explaining things, and it is where I get my nickname. I am very pleased with the frame, and, for now, the rumpled look works for me.

On to beading. This is a design out of Bead and Button Magazine, the October 2010, Issue 99. It is their cover project, and I liked it because of the textures created by the different beads and the angles they were set in. I had to modify it a bit, as I am using the 4mm cubes, not the 3mm cubes called for, but everything else is the same. I think it looks like a circuit board because of the colors of beads I chose.

Meanwhile, I have purchased Stumpwork and Goldwork Embroidery Inspired by Turkish, Syrian and Persian Tiles by Jane Nicholas (Hardcover - Sep 7, 2010) and the pictures in the book are scrumptious. I mentioned before that I got to take a stumpwork class from her, and she is an awesome teacher, and she had pieces from this book with her, so I got to see the actual  pieces, not just photos. They are even more scrumptious IRL. I am currently waiting on an order from Benton and Johnson of various goldwork supplies, then I am going to order the wires and beads from Jane Nicholas' site, I have embroidery floss (even silks!) and ivory silk dupione, and you know I'll be busy. Speaking of Benton and Johnson, I'd like to post a sincere thank you to one Neil Halford, the ever so nice gentleman who answered a zillion questions for me, promptly and completely. And, I had my answers back the day after I sent the questions. He works for/at Benton and Johnson, and I really appreciated the awesome customer service.

My shoulder is continuing to twinge a bit, but nothing like even a week ago, and the neck seems to be pretty much all better. Hi ho, physical therapy is next.

THE Magpie

Tuesday, October 26, 2010

Oh to be by the Ocean, now that Fall is here

I belong to a group called the Tangle, stitchers of all sorts and ages who get together once a month to stitch and also to show off our stitching. We discussed the twelve steps stitchers might use, but we got to the first one, "We admit we have a problem regarding acquisition of stash", and decided there was no problem there, except for the problem of where to store it all.

Anyway, the Tangle met at Ocean City, and oh did we have fun. I finished two projects, the Jane Nicholas piece and also my Arch-Chancellor's Hat piece. Here is the photo of the Jane Nicholas piece. I think it turned out very well indeed.
This is the first piece of stumpwork where I have done the detached petals and leaves, and I really leapt in at the deep end with this one, as I had five flower petals, four dragonfly wings, three raspberries and two leaves to stitch and cut out. Oh, yeah, there was no partridge and no pear tree, but that might make a cute piece to do in stumpwork, along with the other eleven days of christmas.  I was a bit nervous about cutting out the petals and leaves, but I figured I had done the dragonfly wings, so I went ahead and snipped, but I did take them up to the room and did them in total silence. I think it turned out very well indeed. I am thinking of making an etui (that is a little sewing box that has a lid that you remove and the box kind of falls open like a flower) and putting this piece on the lid.

I also put the last ornamentation on the Arch-Chancellor's Hat, and also wrote in and backstitched the quote from Terry Pratchett's book "Sourcery", "When it comes to Glittering Objects, Wizards have all the Taste and Self-Control of a Deranged Magpie". I also did my initials in a signature that I came up with years ago, which I thought was very cool also. I sign a lot of my pieces this way.

So the only thing left is to get it framed and choose just the right place to hang it. I had a lot of fun with this piece, and if anyone finds this and wants to make their own version, just ask in the comment section and I'll give some pointers--although, really, I just cut out a hat shaped piece of red velvet that I had stored all balled up so that it would get lots of wrinkles in, and started adding shiny and sparkly stuff to it. Actually, I am thinking of doing another hat, this time from black velvet, and making it a flapper's cloche or something of the sort. But first, I have a plumeria flower to design and stitch. Although, maybe the plumeria would look nice on a black velvet cloche... hmmm...

Along with stitching at Ocean City, we also did treks to a shop a couple blocks down the boardwalk that is called Salty Yarns, where I got some new fabric for cross stitching, a couple of kits to stitch up, and the turtle bead on the hat, If you look closely at the picture, you may also notice a small shell just under the blue tassel, it is a shell I picked up on the beach and added as a memento of the trip. I got a couple of chances to sit on the beach and watch the waves as well, which is amazingly calming to the nerves.

THE Magpie

Wednesday, October 13, 2010

Wizard's Hat embroidery piece

I have been doing some clearing out of the house, which it desperately needs, and unearthed my wizard hat project from my pile of unfinished objects. So here it is, from where I started to where it is now.
 This is a hat shaped piece of velvet I cut out of an old dress that I picked up at a yard sale. I was looking for crushed velvet to do things with, and I love the color red. The floss is actually red also, I blacked it out.
 Here is where I stopped last time I worked on it. I have applied a tassel and a large crystal drop to the tip of the hat, and a large flower crystal surrounded by eight octagonal bermuda blue crystals.
Now I've added some pearl and gold colored braid and also a metallic gold fancy braid to the brim of the hat, and also some fresh water pearls around the octagonal crystals. I still have some way to go before this is as fancy as the hat described in the book, but I am well on my way. The book is Sourcery, by Terry Pratchett, and the hat is described on page 10, if I recall correctly. Readers of Terry Pratchett's Discworld books will understand this next bit best, but gold lace is involved, and ankhstones, which are like rhinestones but a different river. Having been unable to acquire any octarines here, I used octagonal crystals in Bermuda blue in their place. I still need to add sequins, and totally over do the decoration, as the hat is described. Overdoing is necessary, as, "When it comes to glittering objects, wizards have all the taste and self-control of a deranged magpie." Um. Well, now you know where my screen name came from.

Here are the leaves from the Jane Nicholas piece. I decided to do long and short stitch to fill. I have finished filling one of the leaves, and the other is partially filled. Once I finish that, I just have to add the veining, cut them out and apply them.  The masking tape is covering the stems of wire, so that they don't catch on the thread as I stitch, one of the tips that Jane gave us in class.

THE Magpie


Thursday, October 7, 2010

Goldwork and Stumpwork, this time with photos!

Of the stumpwork. I have yet to do any goldwork, although I have played with some of the materials. Anyway, the Jane Nicholas piece is still moving forward. I have finished the five petals for the hellebore blossom...
 ...and now I just need to cut them out and apply them. Deep breath here, but I survived cutting out the dragonfly wings, so everything should be fine, so long as I am careful and don't have anyone watching. I finally taught my daughter that the one way to cause hilarious pratfalls or failures to perform as planned was to shout, "Watch this!" as you did some amusing athletic/magic trick. Maybe I should stitch a sixth petal as a spare, in case of cutting errors. Hmmm. That sounds like a good plan, and a way to delay the scissor thing.

Here, I have finished outlining one of the two leaves, and the other is mostly done. After I finish the outlines, I will be filling the interiors of the leaves. There is a very faint oval drawn on the leaf fabric, that will be the final raspberry. I will be doing it with very light red, a peachy pink, and a very pale green floss in french knots, and of course, some beads.


Still waiting on a last email from Benton and Johnson, regarding sequins and spangles. The spangles are probably more authentic, but the sequins are heaps less expensive. So now I just have to find out it the sequins are flat or cupped. If they are flat, I am going that route, at least for now. If I decide in future to do a goldwork/stumpwork/Elizabethan embroidery priest's stole and want to use the spangles I'll definitely rethink the miserly route.

Also, I've been thinking that I have got to try doing a plumeria blossom in stumpwork. I think it would be a show stopper, and the flowers come in such a variety of coloring that it would be fun to embroider as well. And, speaking of plumeria, one of my stubs has developed what I think may be flower buds, about a year before I expected any. Here is a picture of it.


THE Magpie

Friday, October 1, 2010

The Queen of Stumpwork, Jane Nicholas, Thank you for teaching me!

The class with Jane Nicholas was totally awesome. She is very nice and a great teacher. If I get a chance to take another class with her, I will absolutely take the opportunity. And she has a new book out, Stumpwork & Goldwork Embroidery Inspired by Turkish, Syrian & Persian Tiles, and she showed us the actual pieces that were photographed for the book. Yum! They are so, so gorgeous.

So on to the class project. It is a stumpwork piece, with a dragonfly, raspberries, two leaves, a hellebore flower, and some wrapped bead berries with detached-work cups. Here is a picture of three of the petals for the flower. They are done with wire couched around the petal shape, then I did buttonhole over the wire. Next, I did a short row of long and shot buttonhole stitch around the outer half of the flower, slanting down toward the inner point. Then I filled in the petal with long and short stitch, and finally added seed stitch in a dark burgundy to add a bit of color to the flower, I love hellebores, they come in a wild variety of colorways. I liked the photo of this one, partly for the contrast between the petal color and the spots.

Next is where I had gotten to on the background as of Thursday morning. The branch with three twigs is the raspberry branch, and it is formed with wrapped chain stitch in DMC floss. The other branch is plain chain stitch, and forms the ivy. The blue "log" is the body of the dragonfly. It will be getting wings, which is the next picture in the queue. The body is formed of two soft cotton strands, which are couched down and then you do a stem stitch anchored by the couching stitches. It looks very cool. I have also seen this stitch used for twigs on larger pieces.

 Here are the dragonfly wings. They are stitched using a fine gauge wire held down with whipped stitches in light aqua rayon machine embroidery thread. The base fabric is a sandwich of aqua chiffon ribbon, metallic fabric like lame in rainbow iridescence both held together with stitch witchery. After the wire is wrapped, veins are stitched in fly stitch down the center in a metallic cord. 

 This is the fabric I did two of the raspberries on. The circles you see is where I cut them out. They were done with french knots using six strands of floss and one wrap. After the knots were finished, I did a running stitch around them, cut out the circle and pulled the running stitches tight to gather the berry into a ball. This is then stitched to the ground fabric at the ends of the twigs. I haven't yet done the sepals, so on the fabric they look rather lonely.
 This is the cupped berry base, my practice one. It seems pretty easy to do, although also it is very easy to get it wrong. Mostly, I was hoping I was doing the knots in the right holes, but it looks pretty nice, I think. Also, one of the leaves is on here in process. It was very neat, the way she showed us to do them. First, you line the wire up along the central stem and couch it, then you whip it all the way to the tip of the leaf. Next, using the same piece of wire, you bend the wire to follow the leaf from the base to the tip, couching all the while, then down to the base again. Finally, you bend the wire out to form the leaf stem and couch the two corners together. Then you do buttonhole stitch all around the outside edge. I have several options for filling, and have yet to decide which I will do.
Here is the piece as of Thursday afternoon, with the dragonfly finished on it. There are also two raspberries applied on it. After I anchored them onto the base fabric, I added some beads in various coordinating shades of red and pink. It gives them a little shine, just like real berries.
After I draw up the directions, I will also be posting the awesome tip Jane gave for starting buttonhole stitch in stumpwork. I never will have to try to figure out how to get it started again. And it is so simple.

THE Magpie

Monday, September 27, 2010

Of cats, and trees, and embroideries

Sadly, a little over a week ago, Einstein, my cat, aged 17.5, died. He was the boss cat of the four we had. So. We currently have three kitties left. Let the Battle for top cat begin. Mostly, the contest seems to be between Nero and Marie who are both a bit over 10 years old.
Nero, that crazy rat bastard who hates everyone

Marie, in whose mouth butter would not dare to melt

Berkeley mostly keeps out of the whole thing, although she will smack at anyone who comes between her and her food. Since she is only a year younger than Einstein, you would think she would be the natural choice for the succession, but she is by nature a shy and retiring sort, hence the nickname Phantom Kitty. For years, people thought we only had one cat, until we found her weakness for grilled meats. Once she found that visitors occasionally handed out grilled meat, she became much more personable, if by that you mean an importuning little mooch.

Berkeley, aka Phantom Kitty, can you believe she is 16 + years of age?
The plumeria count is up to 12, and here are pictures of plumeria seedlings, as I couldn't find any on the web at all, and believe me, I looked. Some of them are starting to grow their first true leaves, the ones that come out after the initial seed based leaflets. I have a bad record of keeping things alive over the winter, so we'll see how I do with these. Here's hoping I do better. I am keeping a record of what I do, so hopefully I won't completely forget about them.


Plumeria seedlings. The center has a nice pair of true leaves.
Tomorrow, and again Thursday, I am taking a Stumpwork class from Jane Nicholas. So you'll be seeing stuff from that here at some point.

Finally, I finished another Cats and Quilts by Diane Graebner, and a little Elizabeth Foster piece that one of my very good friends got me to comfort me over Einstein. Now I have to make a little pillow out of it, once that is done I shall post a picture here.

THE Magpie