Showing posts with label embroidery. Show all posts

Wednesday, July 27, 2011

Paddy yet again

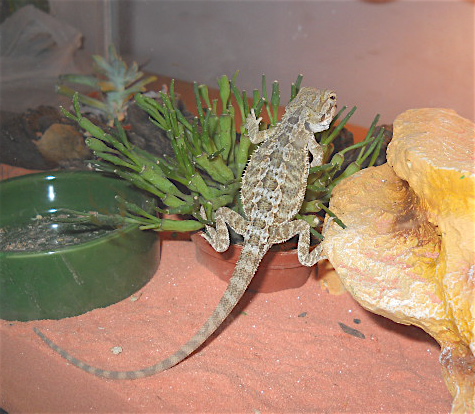
I've been working on Padparadscha, although I did take a week off to help the daughter to look for her dragon. Little idiot decided to take Calypso outside... and Calypso decided to make a break for it. We are now going to hope she survives until it starts getting cooler out, then we'll try to recapture her before it gets too cold and kills her. Keep both daughter and dragon in your good thoughts/prayers/whatevers as the one won't survive the winter, and the other would grieve terribly if she doesn't.

Anyway, I have started doing the metallic thread in fly stitch, and I think it looks glorious! Thank you ever so much Rachel for the suggestion. I also did the nostril with a four ply french knot in the two lighter silks, with a small stitch in the center of the metallic, to darken the middle, if you see what I mean. The eye is done with a size 11 seed bead, and I did a small stitch of the metallic thread over the center of the bead, sort of like a pupil.
As you can see in the picture, I added the bottom wing as well. I used the metallic to add the wing struts--what are those called when it isn't an airplane? I still have the tail portion to do with the metallic, but so far it looks lovely. I plan to add a trellis stitch over the pearl in the metallic thread. After that, I really need to get the legs in so I can do some of the vegetation he is standing in.

Okay, here are a couple of pictures that will make you go, "Awwwwww!"

Detente kitties.
    
Calypso napping in her food dish--with lunch.

THE Magpie

Tuesday, July 12, 2011

Busy. But managed to carve some time for Padparadscha

Well, I got a bit more done on Padparadscha. I am starting to feel a bit more confident about my abilities as an embroidress, even to contemplating actually doing one of the Helen Stevens bird pictures, as opposed to just drooling over the photos in her books. I have an assortment of the flat silks, the ones used in the Chinese embroideries that so often crop up in the restaurants, mostly because they are drop dead gorgeous, plus the colors are to die for--or dye for, as the case may be.

Anyway, here is Paddy as far as I have gotten.
I am not sure how I am going to do his nostril, but his eye is going to be a bead--maybe one of my glow in the dark beads--we'll see. I think I am going to finish the mid color overlay, and then do the metallic fly stitch. His legs are going to be silk most of the way down, and the toes and claws I am planning to do in the metallic braid. Here is a close up of the stitching and overlay.
Once I stitch in the legs and finish the body, I plan to add the left wing, which will be tacked down to the ground fabric. After I finish that and before I do the feet, I plan to start the background. I have some fluffy and fancy yarns to use for grass and bushes.

Okay, I have to post some pictures of the other dragon in my life. She is a cutie pie, and sleeps in the most silly positions.

In this picture, she was asleep, but we woke her when we took the picture.
We measured her, and she is about seven inches long from nose to tail tip.

THE Magpie

Tuesday, June 28, 2011

Dragon, take 42--no wait, that's the meaning of life, the universe...

First, Rachel and RogerBW, thank you for your kind comments. Also for your excellent suggestions. I think I am going to take part of one of Rachel's for the scales, I am going to do layered split stitch (I think that is the one) where you do straight stitches very close together--it isn't satin stitch, which I had pondered but rejected as too smooth, and I learned it doing a very pretty Rowandean kit of a black cat--I really liked how you can curve the stitches around and do very pretty contouring. I am going to use the three colors of silk, layering them from dark to light, and the rust/brown/orange metallic ribbon, which will go on last in fly stitch. I really liked that idea for showing the scales.

Here is the dragon's pearl, as far as I have stitched it. I plan to use some of the metallic and the overdyed silk to do a couched trellis over it.
 I did a padded satin stitch over felt padding. Here is a picture of the partial first layer of satin stitching showing the felt padding underneath.
 I finished the wings finally. I didn't use wire for the second wing, as I am going to tack it down to the ground fabric rather than have it sticking out. I wanted both wings to look the same however, so I backstitched around the wing shape and then whip stitched the same as I did for the wired wing.
 This is the wired wing, with the whip stitch done. I still want to add some veining to the wing, probably with the aforementioned metallic.
Here are both wings with the whip stitch finished. The sparkliness of the base fabrics really shows in the picture.
 I decided to backstitch around the body of the dragon so that I would have an idea of where I was going, and partly to fill time while I noodled around with what I was going to do next.
And finally, here is is with his body backstitched in. I think he is a happy dragon. Maybe someone is going to play ball with him...

In other news, my daughter finally wheedled me into driving her to the local pet shop so that she could acquire her own dragon, of the Australian bearded variety. Her name is Calypso, and I'm pretty sure that pictures of her will probably show up here from time to time. She has settled into her new home very happily, and loves to chase down and eat crickets and mealworms. Not that she has to chase the worms as they just squirm in her food bowl.

THE Magpie.

Thursday, June 23, 2011

More on the dragon

His name is now Padparadscha, which according to Wikipedia is the name given to a pinkish orange colored sapphire, and the word is from the Sinhalese word for lotus blossom. Read more about sapphires than you probably want to know at this address,  http://en.wikipedia.org/wiki/Sapphire#Padparadscha.
I have seen padparadschas, and they are about the same color as the silks I got to stitch him with, hence the naming.

Meanwhile, I have been watching the children (home from school for the summer)  and so haven't gotten a lot done on him, but I did get a bit done. Here is the dragon picture transferred to the blue cotton background.


It is pretty faint, which is good so far as covering up the markings is concerned.


This is a much better photo of the contrast between the top and bottom fabrics of the wings.

These are the silks I got to use on Padparadscha, also the ombre Silk n Colors I am using from my stash and the metallic braid I am planning to use.
This is the wing partly tacked in. I made a pattern piece of the wing, and did running stitch around the outside. Then I tacked the wire down following the running stitch lines.


Here is the wing with the wire tacked down around the outside edge, and I have started whip stitching over the entire wire. I am using the silk and colors for this part.


THE Magpie

Friday, May 13, 2011

The Box in progress--err, finished.

The box is going to be absolutely gorgeous. Okay, the last entry was attaching the felt padding and the embroidery to the plastic canvas round. This one is all about doing the box body. Here are some of the materials I used...

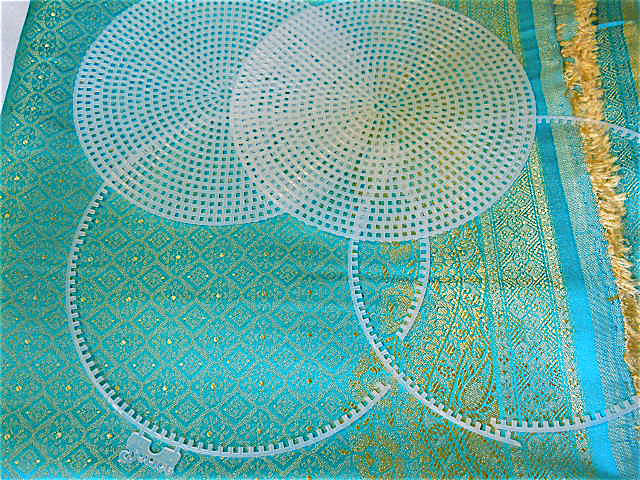
 Plastic canvas rounds and felt for padding cut into circles.
 Plastic canvas cut into a strip and sewn together. I overcast the edge that will be against the lid to add a bit of padding.


 Felt strips for padding the box side.

Plastic canvas side with the felt padding applied to the outside.
 This is the box side piece with all the felt padding applied, I did both inside and outside. I basted it on but only stitched the upper edge of the felt, as the bottom edge will be held down by the fabric cover which I put underneath the side piece.
 This is the liner pieces, with the felt padding basted onto the plastic canvas. I cut one row of holes from the outer edge, so that they will fit into the box with the fabric cover and felt padding. The lid piece needed to be smaller so that I could get the decorative braid along it.


This is the inside and outside of the box sides. I folded the fabric over the plastic canvas and felt sandwich, and basted the inside and outside together. Then I ran a gathering stitch and pulled it tight. The box bottom and bottom liner will cover the resulting ruffles.
This is the bottom with the beads I am using as feet sewn on it. I am slip stitching the two pieces together.
 This is the box bottom after I did the gathering stitches and before I did the lacing. The liners are done the same way, but I put the more yellow side of the fabric up for them. I thought it would make a pleasing contrast.
Here is the box bottom completely assembled. I used glue to attach the bottom liner. 
This is the side of the box. I really liked the rose border motif on the fabric, so I  cut it so that this would show.

This is the bottom of the lid. I slip stitched the edges, after applying glue to hold them together flat. Then I sewed the braid around the outer edge of the lining.

Finally, here is the lid from the top. I am very pleased with how this turned out.
This is a picture of Berkeley and Marie Curie, sitting on the back of the sofa and watching the birdies in the mulberry tree as they stake out their branches. I call it CATV, and it entertains them for minutes at a time, after which they are exhausted and must nap diligently to regain their strength. They also like to sleep on brocade, which I know because I took a bathroom break and laid my box aside while I did so. When I got back, Marie was snoozing on the pieces.

THE Magpie

Friday, May 6, 2011

Making a Box

Exactly what the title says, I am going to take you through the assembly of a box, with a piece of stitchery as the lid. I am either cheap or thrifty, your choice, but I am also a fast stitcher, and the cost of framing lots of pieces of stitchery becomes insane, especially if you want them to be right. Hence the wallhangery and quilting options I usually employ. This is a third option, for those things that are not really suited to wall hangings and cannot handle the treatment they would receive as a quilt. Like, for instance, the piece of goldwork I just finished.

So. I am doing a simple round box, using plastic canvas as the supporting sides and top and bottom. As you read down, I have included pictures of all the supplies, along with the fabric I am using for the sides. I found it at my local Jo-Ann's Fabrics and Crafts store, and it is even yummier in person than the pictures show.
I was actually checking to see if they had any more of the silk dupione that either matched the blue I used or complemented it--gold would have been acceptable also. They had neither, so I went wandering through all the satins etc... Got to the brocades, saw lots of pretty fabric, then saw a flash of blue and gold. Dug it out of its niche, held the embroidery up to it, and figured I had a winner. There is a rose border that I am going to use as the box side, and an all over diaper (that is a diagonal pattern--I'll have to check why we now use that as a word for a baby's undergarment, yes?) pattern of large and small diamonds. Here is a picture of the front and back of the fabric.
And here is a closeup of the edging...
With me so far?  I also got four plastic canvas rounds, The original size is 6 inches, and trimmed the outer ring off two of them to use as the inside lid and inner bottom. I also have a piece of the very large stiff canvas, and cut a piece that is 2 x 19 inches for the box side, and one that is 1 x 19 for the lid. Hey, all you who didn't think you would ever use geometry after high school or college? Surprise! It is an easy formula, basically, Pi x the diameter of the circle. This gives the circumference of the circle, and I will _Never_Never_Ever_ forget the formula, although I did, in eighth grade, get a bit tired of the endless 20 problem worksheets we did while people were learning this. Um. I also remember Pi R Squared (for the area of a circle), and I think if you have either the radius or the diameter, you can figure out the other, being that the radius is half the diameter, so for our purposes, we need to multiply 3.14 and 6, which is 18.84 inches. With seven count (or seven stitches to the inch canvas, I will be adding an extra couple of rows for an overlap. I don't have to worry about the inner liner size because it is mostly there to look nice, and to cover the seams from the box and lid sides, when I gather them up and sew the sides onto the lid and base.
This is the rings with the edges cut off.
 I am using felt to pad the canvas, so that it isn't prickly or hard, and it looks better. Just cut to fit. I also stitch it to the sides top and bottom so that it doesn't shift around.
This is basic plastic canvas. It now comes in three sizes that I know of, seven count, ten count and fourteen count. The seven count is the stiffest, and it comes in two weights, one of which is stiffer than the other.
 Okay, I have gathered the edges of the stitched piece and sandwiched two felt rounds in between the plastic canvas disc and the stitched piece. For reference, this is a disc with a 4 and 1/2 inch diameter.
 The back of the lid, showing the basting/gathering stitches and some of the lacing. I have some more lacing to do, but I ran out of thread. This part is the trickiest of the box, as you can "pringle" the disc if you don't pull the lacing evenly. On the other hand, I can't lace a square or rectangle properly to save my life but I can do discs. Go figure. It is pretty easy to get the right tension, if it starts to look like a potato chip, lighten the tension ;-).
Sewing thread, ball of yarn, large piece of plastic canvas, and four beads I am going to attach to the bottom of the box as feet. I use the yarn to attach the ends of the plastic canvas together, and sometimes I overcast the edges as well, for the look of the finished box.

THE Magpie

Wednesday, May 4, 2011

Finished the Lily, on to Michele's Challenge

 Figured I'd cut to the chase and just put the picture front, center and on top. Isn't it pretty?! www.bentonandjohnson.com, kits, Golden Lily. The kit contents are ample to do the project, including a bit extra, although because I am new to it I think I may have used more of the Japan Gold than ordinarily, there was enough but no leftover (not a problem, as I bought a spool of the stuff as well). I am going to be getting some plastic canvas rounds to use as a base for a box lid--I like it because it adds stability and I don't have to cut out cardboard or foam core. Plus, if I do a round, I don't have to worry about mitering the corners. I can lace rounds, but so far trying to lace squares and rectangles is beyond me. On the other hand, I can do mitered corners when sewing--I'll have to get a picture of the piece I am doing as a wall hanging that has a piece of stripe fabric that I mitered so that the stripes form a border around the piece. Turned out very cool.

Meanwhile, I have started the next piece, a flower from Michele's Challenge pieces.

 This is the design transferred to the back of the muslin. Next I affix the background fabric to the front of the muslin... like so
This is the background for the flower. Next step is to baste the shape so that I can start stitching it. I am limited to two stitches for the piece. I have decided that Satin Stitch will be one of them, as it is a very versatile stitch, depending on whether it is longer stitches or short ones, or on how hard you pull the stitches. The other stitch is going to be couching, another versatile stitch.

THE Magpie


Saturday, April 23, 2011

Goldwork, and other stitching.

Finished the waterlily, and started and finished the tiger lily in my oriental flowers, so I am now over half done with the cross stitched patches for the quilt. Yay!

Also, after studying the directions, reading, re-reading, and examining all the supplies, and finding my silk dupione stash, I have at long last started on the Golden Lily pattern from Benton and Johnson. To start, I drew the picture on the back of the muslin with a pencil, backwards. Then I basted it in with the same floss that I was going to use to couch the metal threads down with. Here is a picture of the back with the basting partly in...


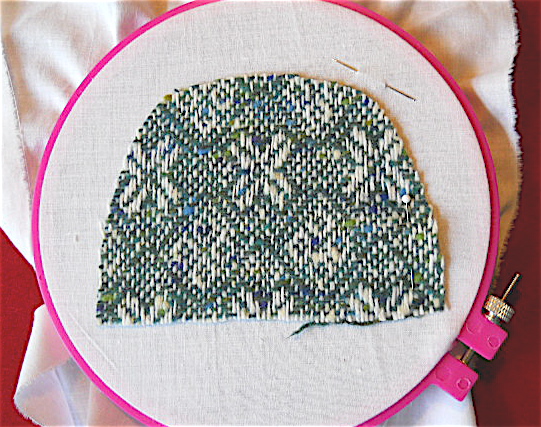
Here is the front. Because I did the stitches on the front very small, you can't see them very well, which bodes well on me being able to cover them up.


This is one of the flower buds with the japan gold around it, and extending down as the stem.


The closed teardrop shapes are going to be finished with gold kid leather. There are also curled leaf shapes will be filled with bright check, after it is cut into "beads". All the lines will be couched japan gold, and I like the way they have you plunge one end of the pair of gold threads, then separate them to go around the open shape, and finally couch them together for the stems. I don't know if that is standard operating procedure, as I have not taken any goldwork classes, and this is the first thing I've ever done in goldwork, but I like how it looks.

The kit for this actually came with an ice blue silk piece for the ground, but the picture on the kit was more of a turquoise, so I subbed a piece out of my stash. The couching thread I am using is a cotton overdye named Whiskey, from Weeks Dye Works, color 2219. Other supplies are japan gold, check thread, bright check, gold kid leather and something called passing, which is a wire cored gold metal thread that looks kind of like japan gold. Ah. Just re-read the directions, because it occurred to me that I did not remember where the passing thread was supposed to be used. There is a bit that forms a bow over the stems on the bottom, and the passing thread is used to make them, and that is where the wire is handy, as you just make loops with the thread and then bend them into shape on the front.

I realized that doing this stuff intimidates me, at least until I start, although sometimes it runs all the way through the project. Even so, I still do it, and usually the things turn out very nicely. So to anyone who is reading/finds/whatever, if you want to do something that you fear is above your skill level, go for it. You never know, and it will most likely turn out very well indeed. Go for it. And have fun.

THE Magpie