Friday, May 13, 2011

The Box in progress--err, finished.

The box is going to be absolutely gorgeous. Okay, the last entry was attaching the felt padding and the embroidery to the plastic canvas round. This one is all about doing the box body. Here are some of the materials I used...

 Plastic canvas rounds and felt for padding cut into circles.
 Plastic canvas cut into a strip and sewn together. I overcast the edge that will be against the lid to add a bit of padding.


 Felt strips for padding the box side.

Plastic canvas side with the felt padding applied to the outside.
 This is the box side piece with all the felt padding applied, I did both inside and outside. I basted it on but only stitched the upper edge of the felt, as the bottom edge will be held down by the fabric cover which I put underneath the side piece.
 This is the liner pieces, with the felt padding basted onto the plastic canvas. I cut one row of holes from the outer edge, so that they will fit into the box with the fabric cover and felt padding. The lid piece needed to be smaller so that I could get the decorative braid along it.


This is the inside and outside of the box sides. I folded the fabric over the plastic canvas and felt sandwich, and basted the inside and outside together. Then I ran a gathering stitch and pulled it tight. The box bottom and bottom liner will cover the resulting ruffles.
This is the bottom with the beads I am using as feet sewn on it. I am slip stitching the two pieces together.
 This is the box bottom after I did the gathering stitches and before I did the lacing. The liners are done the same way, but I put the more yellow side of the fabric up for them. I thought it would make a pleasing contrast.
Here is the box bottom completely assembled. I used glue to attach the bottom liner. 
This is the side of the box. I really liked the rose border motif on the fabric, so I  cut it so that this would show.

This is the bottom of the lid. I slip stitched the edges, after applying glue to hold them together flat. Then I sewed the braid around the outer edge of the lining.

Finally, here is the lid from the top. I am very pleased with how this turned out.
This is a picture of Berkeley and Marie Curie, sitting on the back of the sofa and watching the birdies in the mulberry tree as they stake out their branches. I call it CATV, and it entertains them for minutes at a time, after which they are exhausted and must nap diligently to regain their strength. They also like to sleep on brocade, which I know because I took a bathroom break and laid my box aside while I did so. When I got back, Marie was snoozing on the pieces.

THE Magpie

Friday, May 6, 2011

Making a Box

Exactly what the title says, I am going to take you through the assembly of a box, with a piece of stitchery as the lid. I am either cheap or thrifty, your choice, but I am also a fast stitcher, and the cost of framing lots of pieces of stitchery becomes insane, especially if you want them to be right. Hence the wallhangery and quilting options I usually employ. This is a third option, for those things that are not really suited to wall hangings and cannot handle the treatment they would receive as a quilt. Like, for instance, the piece of goldwork I just finished.

So. I am doing a simple round box, using plastic canvas as the supporting sides and top and bottom. As you read down, I have included pictures of all the supplies, along with the fabric I am using for the sides. I found it at my local Jo-Ann's Fabrics and Crafts store, and it is even yummier in person than the pictures show.
I was actually checking to see if they had any more of the silk dupione that either matched the blue I used or complemented it--gold would have been acceptable also. They had neither, so I went wandering through all the satins etc... Got to the brocades, saw lots of pretty fabric, then saw a flash of blue and gold. Dug it out of its niche, held the embroidery up to it, and figured I had a winner. There is a rose border that I am going to use as the box side, and an all over diaper (that is a diagonal pattern--I'll have to check why we now use that as a word for a baby's undergarment, yes?) pattern of large and small diamonds. Here is a picture of the front and back of the fabric.
And here is a closeup of the edging...
With me so far?  I also got four plastic canvas rounds, The original size is 6 inches, and trimmed the outer ring off two of them to use as the inside lid and inner bottom. I also have a piece of the very large stiff canvas, and cut a piece that is 2 x 19 inches for the box side, and one that is 1 x 19 for the lid. Hey, all you who didn't think you would ever use geometry after high school or college? Surprise! It is an easy formula, basically, Pi x the diameter of the circle. This gives the circumference of the circle, and I will _Never_Never_Ever_ forget the formula, although I did, in eighth grade, get a bit tired of the endless 20 problem worksheets we did while people were learning this. Um. I also remember Pi R Squared (for the area of a circle), and I think if you have either the radius or the diameter, you can figure out the other, being that the radius is half the diameter, so for our purposes, we need to multiply 3.14 and 6, which is 18.84 inches. With seven count (or seven stitches to the inch canvas, I will be adding an extra couple of rows for an overlap. I don't have to worry about the inner liner size because it is mostly there to look nice, and to cover the seams from the box and lid sides, when I gather them up and sew the sides onto the lid and base.
This is the rings with the edges cut off.
 I am using felt to pad the canvas, so that it isn't prickly or hard, and it looks better. Just cut to fit. I also stitch it to the sides top and bottom so that it doesn't shift around.
This is basic plastic canvas. It now comes in three sizes that I know of, seven count, ten count and fourteen count. The seven count is the stiffest, and it comes in two weights, one of which is stiffer than the other.
 Okay, I have gathered the edges of the stitched piece and sandwiched two felt rounds in between the plastic canvas disc and the stitched piece. For reference, this is a disc with a 4 and 1/2 inch diameter.
 The back of the lid, showing the basting/gathering stitches and some of the lacing. I have some more lacing to do, but I ran out of thread. This part is the trickiest of the box, as you can "pringle" the disc if you don't pull the lacing evenly. On the other hand, I can't lace a square or rectangle properly to save my life but I can do discs. Go figure. It is pretty easy to get the right tension, if it starts to look like a potato chip, lighten the tension ;-).
Sewing thread, ball of yarn, large piece of plastic canvas, and four beads I am going to attach to the bottom of the box as feet. I use the yarn to attach the ends of the plastic canvas together, and sometimes I overcast the edges as well, for the look of the finished box.

THE Magpie

Wednesday, May 4, 2011

Finished the Lily, on to Michele's Challenge

 Figured I'd cut to the chase and just put the picture front, center and on top. Isn't it pretty?! www.bentonandjohnson.com, kits, Golden Lily. The kit contents are ample to do the project, including a bit extra, although because I am new to it I think I may have used more of the Japan Gold than ordinarily, there was enough but no leftover (not a problem, as I bought a spool of the stuff as well). I am going to be getting some plastic canvas rounds to use as a base for a box lid--I like it because it adds stability and I don't have to cut out cardboard or foam core. Plus, if I do a round, I don't have to worry about mitering the corners. I can lace rounds, but so far trying to lace squares and rectangles is beyond me. On the other hand, I can do mitered corners when sewing--I'll have to get a picture of the piece I am doing as a wall hanging that has a piece of stripe fabric that I mitered so that the stripes form a border around the piece. Turned out very cool.

Meanwhile, I have started the next piece, a flower from Michele's Challenge pieces.

 This is the design transferred to the back of the muslin. Next I affix the background fabric to the front of the muslin... like so
This is the background for the flower. Next step is to baste the shape so that I can start stitching it. I am limited to two stitches for the piece. I have decided that Satin Stitch will be one of them, as it is a very versatile stitch, depending on whether it is longer stitches or short ones, or on how hard you pull the stitches. The other stitch is going to be couching, another versatile stitch.

THE Magpie


Tuesday, May 3, 2011

Goldwork yet again, almost done with the stitching

I have almost finished the Golden Lily, and goldwork is fun, not to mention pretty. I'm thinking of doing the lily again, this time on dark navy blue with silver threads. Or not, so many projects, so little time. Here is a a picture of the Lily as of now.
I have two more leaves to stitch in. I put the bright check pieces on the fabric so you can see how it looks pre and post cutting up. They are like little springy beads, and you run the needle up the hole in the center of the spring and sew them down just like beads. Pretty easy, really. Bright check is fun, it absolutely flashes in the sunlight.

I have been thinking about the Michele's Challenge pieces, and the first flower is going to have some goldwork on it.


The top left hand flower is the one I am doing. I think the stitches I will use (I am limited to two) will be satin and couching. I will be using the rounded piece of fabric that is over the pictures as the background. I have the hoop set up, and it is a fairly simple matter to transfer the design. I am getting excited about it, which I know because I was dreaming about doing this one last night.

THE Magpie

Tuesday, April 26, 2011

Goldwork redux, and flowers and vases. Also some plants.

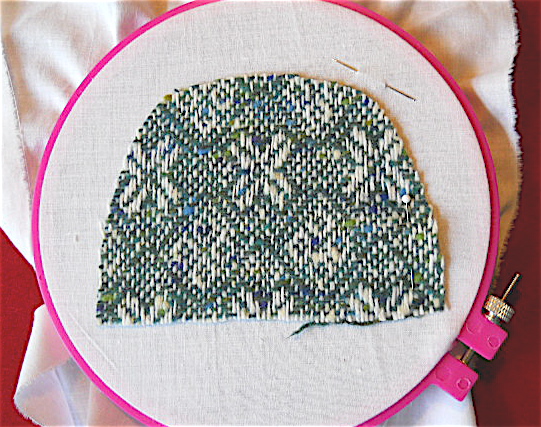
Here is where I've gotten on my Benton and Johnson Lily kit. Actually, all I have left is some detail on the flowers and filling in the leaves with bright check "beads". Bright check is wire that has been bent into a square spring shape, and it is flat on the outside, so it really reflects light marvelously well.

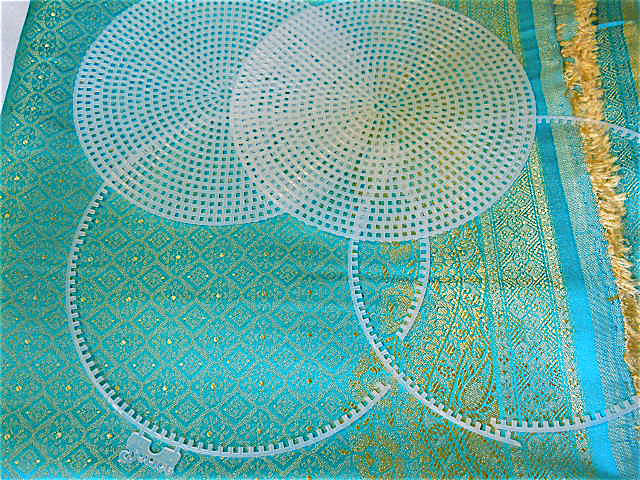
Here is a picture from before I finished sewing down the leather flowers, with the check wire on top of the piece. That wiggly, squirmy thing is absolutely wonderful stuff. My daughter says it is very fun to hold it in the air and gently jiggle it, as it transmits a buzzing feeling to your fingers, so of course I had to try that. Plus, it absolutely multiplies light, sending sparkles everywhere. And sadly, what you do with it is to cut it into short lengths and sew it down like beads. Well, that actually gets us to why I stopped where I did. I thought I had my wire cutters with me, but I didn't, so got stalled yesterday, as I will not use my good embroidery scissors to cut wire. I was down at my sister's house, and she gave me a beech tree for my yard, and has promised a sassafras tree once she figures out where her colony of them is. I'm starting her a couple of trees from my yard, including the native persimmon tree, of which I have a female in the yard, so usually have a zillion seedlings to choose from.

I have moved my tropical trees outside now, as we should no longer be in danger of getting frost. Here are their pictures...

This is Granny Weatherwax. She is about eighteen inches tall, and her leaves are about six inches long. She had a little trouble with Marie the cat again, after I took her off the bookshelf she was on. Marie loves avocado leaves. Weird.
 This is the pink plumeria. The flower buds survived the winter, and I have moved her to the porch and given her some water.

Lastly, here is the lemon tree. Nero, in complete contrast to the normal run of cats, who allegedly dislike citrus intensely, liked the chew on her leaves. In front of her, in the two boxes, are dormant blueberry bushes. Not quite sure exactly where they are going to go, probably in what I call the "Way Back Yard, which is up a very steep hill with a staircase from the rest of the back yard. I also have a pair of raspberry bushes that I have not yet placed. One of them has flowers, so the raspberry loving daughter will be very happy.

 These are the vases that I have done for the quilt. They fabric is a square around 10 inches to a side, some a bit taller, some a bit narrower, but all will be trimmed to the same dimensions when I am ready to sew the quilt together. Three of them are from a chart titled Vase Row, only I have been stitching them separately so that I could use them with the flowers.
This vase is one of three I am doing that came from Mary Hickmott's New Stitches magazine. Being roughly the same dimensions as the other vases, I decided to incorporate them to make the numbers a bit more even. Stylistically, they are both different and similar, and I think they look nice together.
Another vase. This is the first vase I stitched. Not sure why I remember that, but I do.
Blue and white vase. The one I am working on now has more blue and white, and also has a spray of flowers in the vase. The other two from Vase Row are a turquoise vase with a coral pink flower and a black vase with a white flower.
 This is one of the fabrics I am using as sashing. this print is going around the vases. The oranges and golds of the flowers look very nice with the vases, and echo the golden brown in some of the vases.
 Tree Peony. And yes, it does kind of look like there is a bit missing from one side of the flower, but that is the way the designer did it. Um. Yes, several people have mentioned that to me, why do you ask?
Lotus. This is one I finished recently, and when I was doing it I was very unsure about the greens, mostly whether they would look nice together. One was more blue green the other tended toward olive. They worked well together though.
This one is Tiger Lily. My brother's in-laws went to Taiwan, and sent me a birthday card that they got there. The picture on the card is very similar to this one, which is why I started collecting the kits in the first place. Also, they are drop dead gorgeous, so there are two reasons.
 This is Chrysanthemum. The photo with the kit is much lighter yellow than it ended up being, which I was happy about. I love the spider mums, which is what these look like, because of the long curly petals they have.
 This one it titled Clematis, and I think I have done all the yellow flowers now. This is the one I was working when I took a very long break from cross stitching.
 Iris, and the only one of these which I varied from the kit contents. I really hated the change from the darkest purple to the next color, so I added an intermediate color. The top iris has the darkest purple with my intermediate and the next purple, for the two bottom flowers the darkest color is the intermediate.
This is Wisteria. Everyone likes this one the best, and it is the second flower I did. It really turned out well, but the metallic gold backstitching on it was tricky. I did a lot of what I learned is called Holbein or double running stitch, but which I call Bilbo stitch, and fans of The Hobbit will, I hope, get a giggle when I explain that it is because you go there and back again. This is all the flowers I have done, I still have Morning glory (blue violet), Quince, (orange), Poppy (red), Magnolia (pink), and Camellia (dark pink-red). I also have five vases left, and yes, I did that on purpose, so I can alternate flowers and vases. I am working on a blue and white vase right now, but have not yet taken a picture.

This is the fabric I am using for the sashing for the flowers. I think it looks like Gingko leaves, or maybe cilantro. One of those. It also looks absolutely fabulous with the flowers, so I have high hopes that the quilt will turn out well. Maybe I'll take a page from my sister's book, and get Mum to sew the top together in stages...

THE Magpie

Saturday, April 23, 2011

Goldwork, and other stitching.

Finished the waterlily, and started and finished the tiger lily in my oriental flowers, so I am now over half done with the cross stitched patches for the quilt. Yay!

Also, after studying the directions, reading, re-reading, and examining all the supplies, and finding my silk dupione stash, I have at long last started on the Golden Lily pattern from Benton and Johnson. To start, I drew the picture on the back of the muslin with a pencil, backwards. Then I basted it in with the same floss that I was going to use to couch the metal threads down with. Here is a picture of the back with the basting partly in...


Here is the front. Because I did the stitches on the front very small, you can't see them very well, which bodes well on me being able to cover them up.


This is one of the flower buds with the japan gold around it, and extending down as the stem.


The closed teardrop shapes are going to be finished with gold kid leather. There are also curled leaf shapes will be filled with bright check, after it is cut into "beads". All the lines will be couched japan gold, and I like the way they have you plunge one end of the pair of gold threads, then separate them to go around the open shape, and finally couch them together for the stems. I don't know if that is standard operating procedure, as I have not taken any goldwork classes, and this is the first thing I've ever done in goldwork, but I like how it looks.

The kit for this actually came with an ice blue silk piece for the ground, but the picture on the kit was more of a turquoise, so I subbed a piece out of my stash. The couching thread I am using is a cotton overdye named Whiskey, from Weeks Dye Works, color 2219. Other supplies are japan gold, check thread, bright check, gold kid leather and something called passing, which is a wire cored gold metal thread that looks kind of like japan gold. Ah. Just re-read the directions, because it occurred to me that I did not remember where the passing thread was supposed to be used. There is a bit that forms a bow over the stems on the bottom, and the passing thread is used to make them, and that is where the wire is handy, as you just make loops with the thread and then bend them into shape on the front.

I realized that doing this stuff intimidates me, at least until I start, although sometimes it runs all the way through the project. Even so, I still do it, and usually the things turn out very nicely. So to anyone who is reading/finds/whatever, if you want to do something that you fear is above your skill level, go for it. You never know, and it will most likely turn out very well indeed. Go for it. And have fun.

THE Magpie

Friday, April 1, 2011

Happy Birthday Berkeley and Marie

As near as we can ascertain, not having the precise date, this the the birthday of my cats Berkeley and Marie Curie. I figure that makes sense, as all cats are April Fools. Well, Marie is anyway, as she gets into a state in the Spring where she is, quite literally, bouncing off the walls. And racing up the hall, down the stairs, behind the books on the shelves, and otherwise going berserk. Mind, all that is without the aid of catnip.

Meanwhile, I have been working on my oriental flowers and vases quilt, I got some new fabrics for the sashing, and finished a couple more flowers and another vase. I just started the tiger lily, you can see a photo here http://www.choicesembroidery.co.uk/acatalog/Oriental_Collection.html, and that is all twelve of the flowers. I have finished peony, wisteria, iris, clematis, chrysanthemum and lotus. I just started the lily, so all I have so far is some green and brown curves on the fabric. Once the light is good, I'm going to get a photo of the two fabrics I just got for the quilt, and I think I may start cutting strips and adding sashing to the blocks I've stitched so far. With twenty-one blocks, the sashing is going to be a big job.

I'm also going to start working again on my Month quilt, of which I have finished the first four blocks and stitched them together. I started the cross stitch blocks in January of 2001, and after September put them aside for several years, and finally finished the last of them in 2010. There are three small stitched patches for each month, and then I picked out a fabric that went with each monthly set of three blocks to put them together into larger blocks. The sashing is a pretty green and cream swirl. I put it aside when I couldn't get the May block to come out even, but I think it may be time to take it up again. The stitched pieces were all out of a book titled "365 Tiny Cross Stitch Designs" and some were done in themes, of which I did the samplers, quilt blocks and flowers of the month. The pieces are lovely, and as I stitched, I added the occasional deviation from the actual design. Sometimes I used specialty stitches, for the Easter Sampler I used angora yarn for the bunny tails, for the July Sampler I used beads and silk ribbon to do the ears of corn, things like that. Again, once the light is better, I'll get some photos of those.

I haven't forgotten about my Jane Nicholas Stumpwork pieces, or my Michele Chavez pieces either. Still mulling options in my head, and once I have my plan figured out, I shall begin. I just got the blue silks I needed for the blue peony from the Jane Nicholas book, so that may be the first piece I do from it.

THE Magpie